Category Archives: DIY

Charge Bauer 20v Lithium Packs Using a Balance Charger

This all started the other morning when I realized I had left my Bauer battery pack and charger outside in the rain. Long story short you can use the plug from a broken charger to make an adapter to charge your battery packs with a RC Vehicle Balance Charger.

Bauer 20v + TBS Charger
Bauer 20v Pack Connected to Balance Charger

The Story

After sitting, plugged in, in the rain, overnight, there was a large amount of blue material on the battery and charger connections.

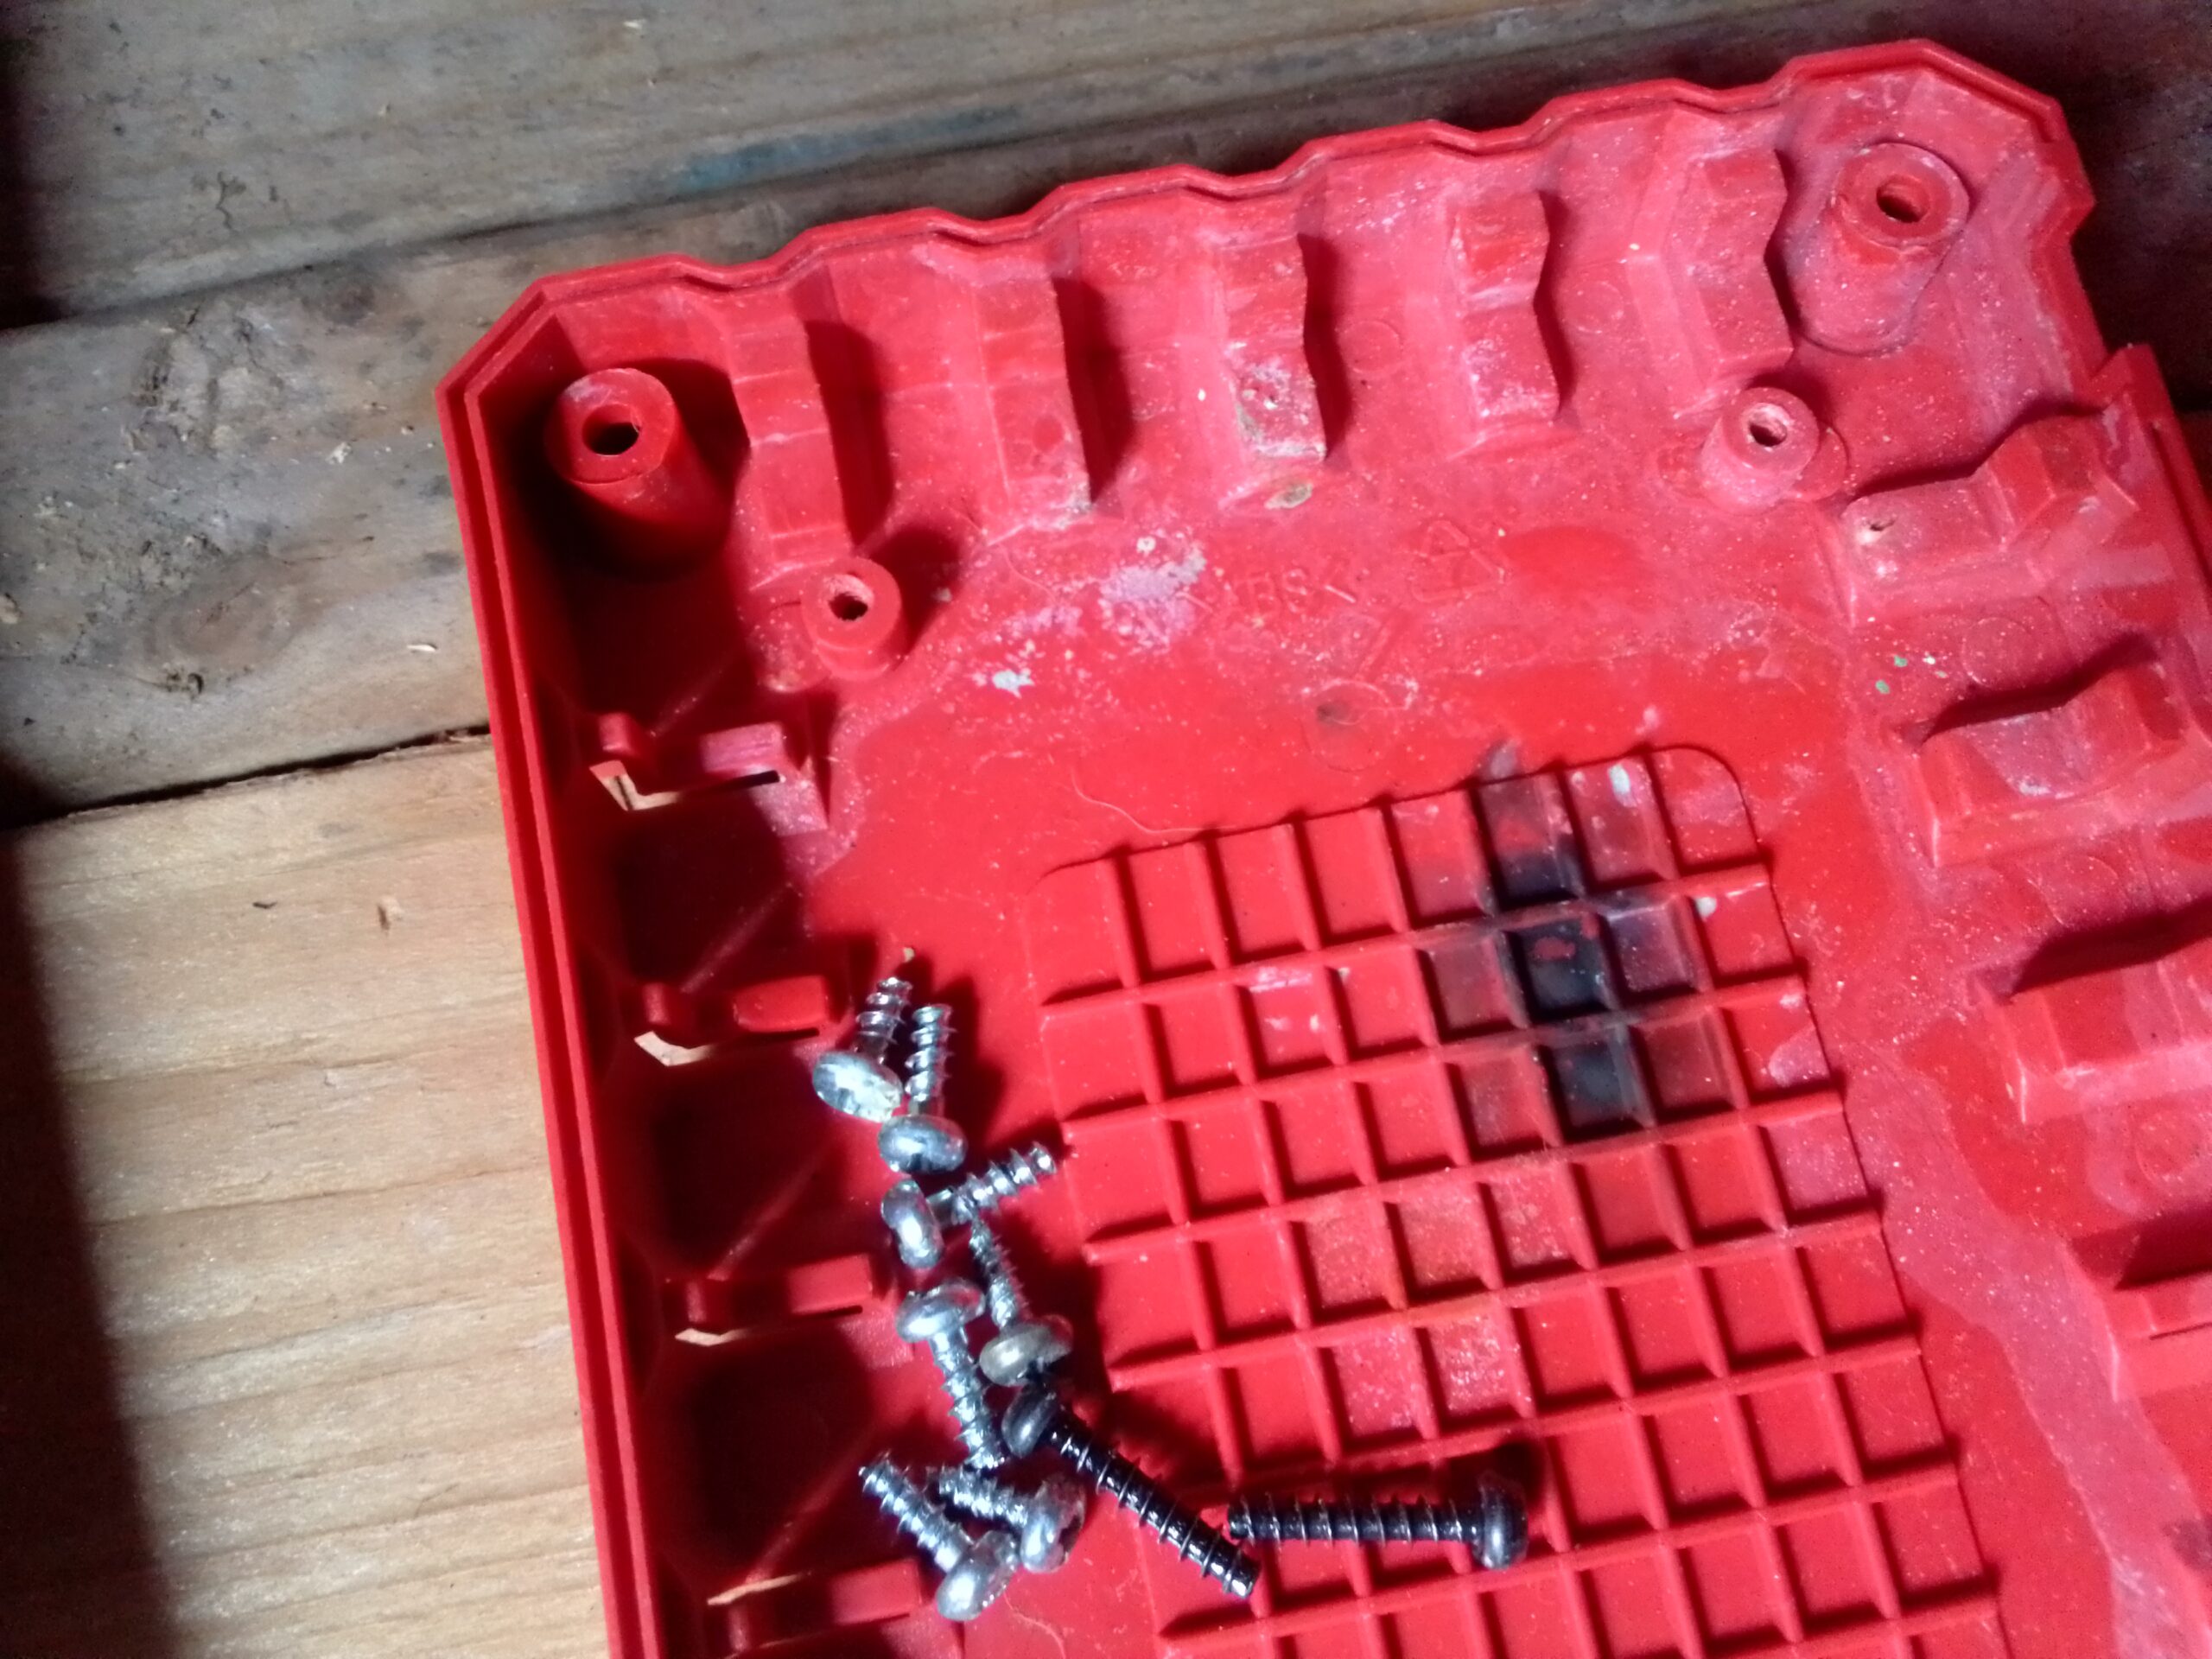
Pushing the button on the battery showed full charge, so I cleaned off the connections and tried it in my drill. No dice. I dissembled the battery pack by removing the four torx screws on the bottom. There was corrosion on the inside of the connector but everything else looked OK. I cleaned off the connectors from the inside and reassembled the battery.  JOY! The battery is working again.

Things were not so good for the charger. Under the charging board there was a huge black spot where a bank of resistors had fried.

Magic Smoke Stain

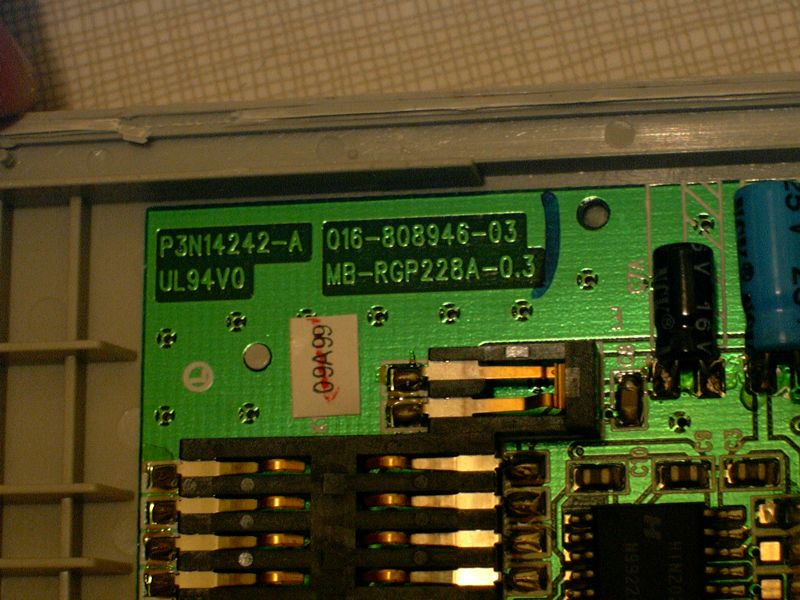
I was thinking about repairing it when I noticed that the plug part inside the charger was a self contained unit. Not only that, the connection plug for the sense port was the same as the plugs on the batteries for LiPo  RC batteries (eg Drone Batteries).

The pin-out on the above mentioned plug is not the same as a standard RC LiPo battery, but all the necessary components (and then some) are. If you are looking at the balance plug (on a Drone Battery for example) with the bumps facing down, the leftmost wire is ground and the next wire to the right is the voltage of one cell. The third wire is the voltage of two cells, the fourth wire is the voltage of three cells and so on depending on how many cells you have.

The Hack

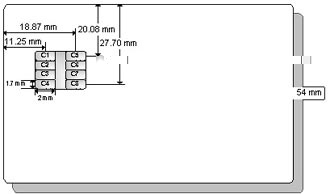
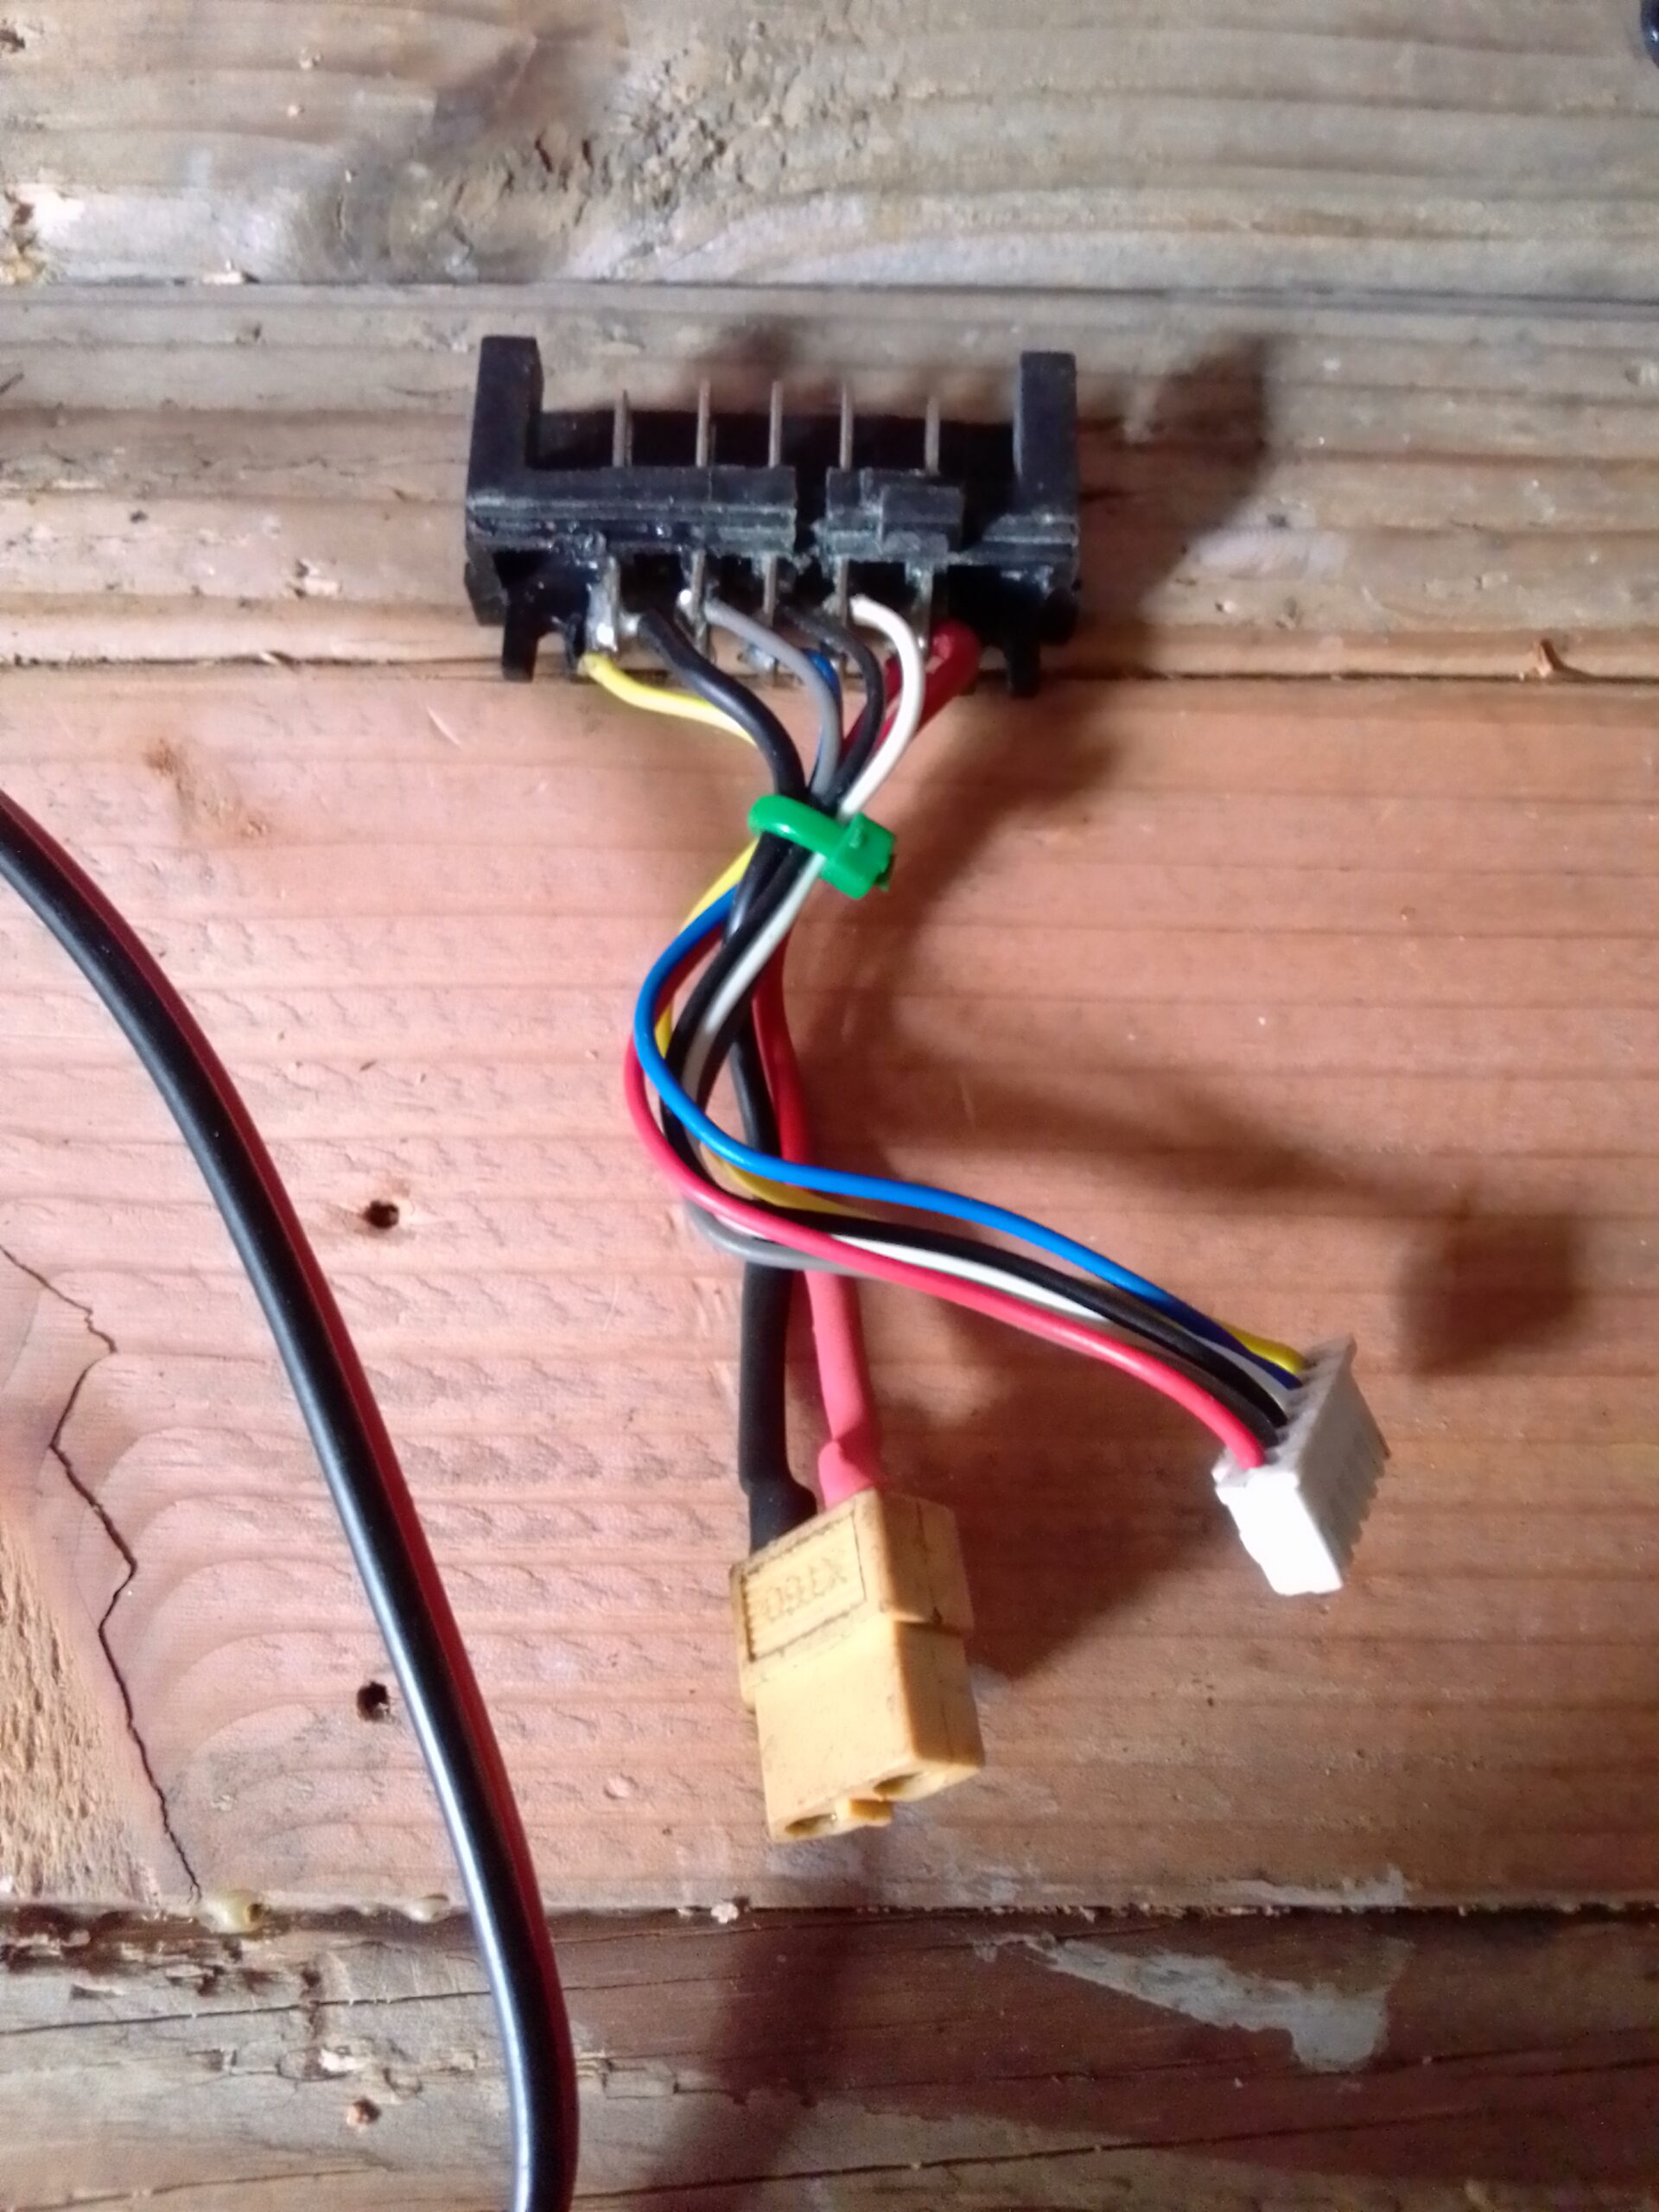
In a nutshell we need to make the Bauer battery pin-out match a stander RC Lipo Battery. The finished adapter will look something like this:

Bauer Adapter Dongle

You will need security torx bits (with holes in the middle) to remove the bottom plate from the charger. Then just unscrew all the Philips screws until you have just the battery plug unit. Unplug the 6 wire plug from the board and cut the red and black wires as close to the board as possible.

Using a small screwdriver to press down the tabs, remove the pins from the 6 pin plug (they need to be rearranged).  The small yellow and red wires (that you just pulled from the plug) are for the battery’s internal temperature sensor, we don’t need to monitor this sensor so we can use these wires to finish our plug. De-solder the small yellow wire and solder it with the main negative (big black wire). De-solder the small red wire and solder to the main positive (big red wire).

Move small red wire to big red wire post. Move yellow wire to big black wire post.

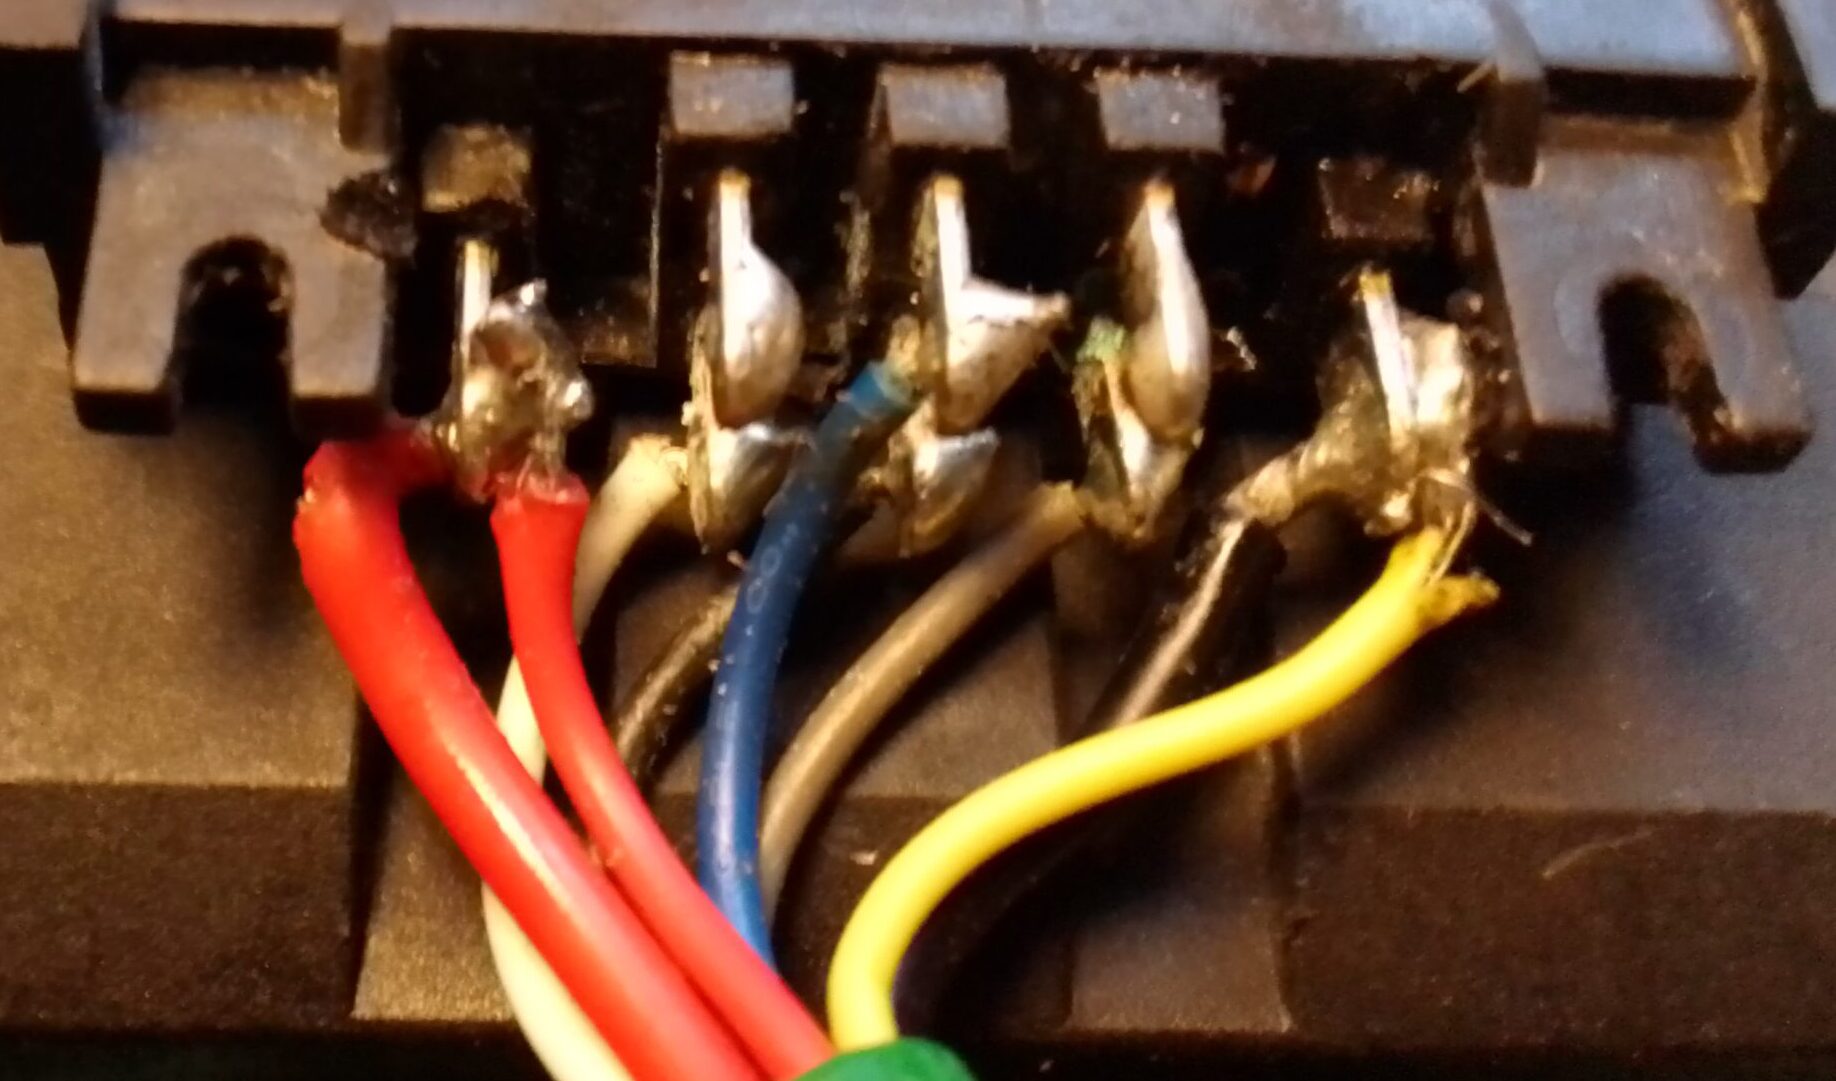
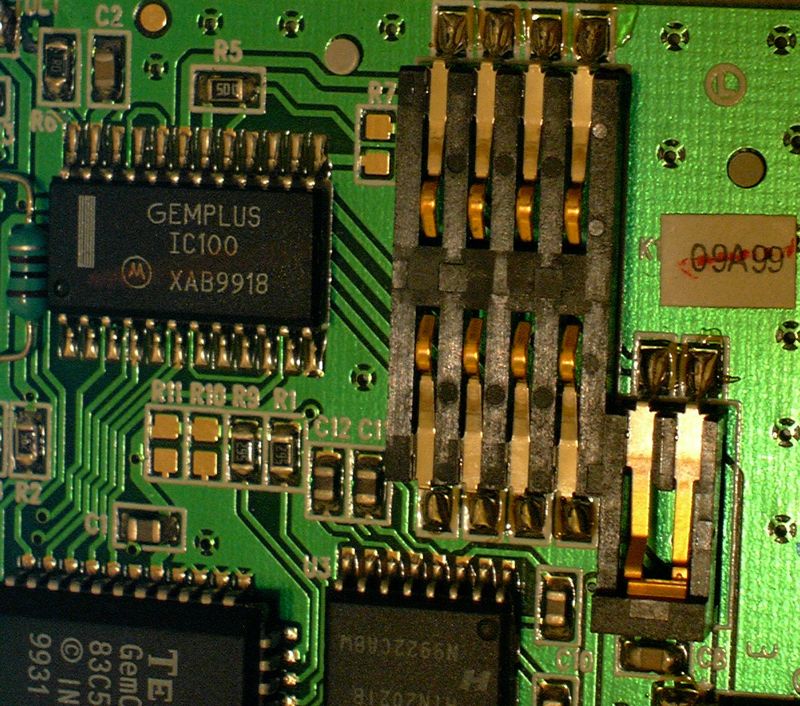
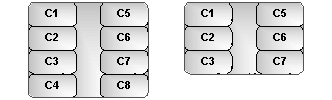
Solder a battery connector (salvaged from old battery pack) to the main positive and negative (big wires). Finally reinsert the pins into the plug as pictured:

Bumps Up: Red, Grey, Black, White, Blue, Yellow

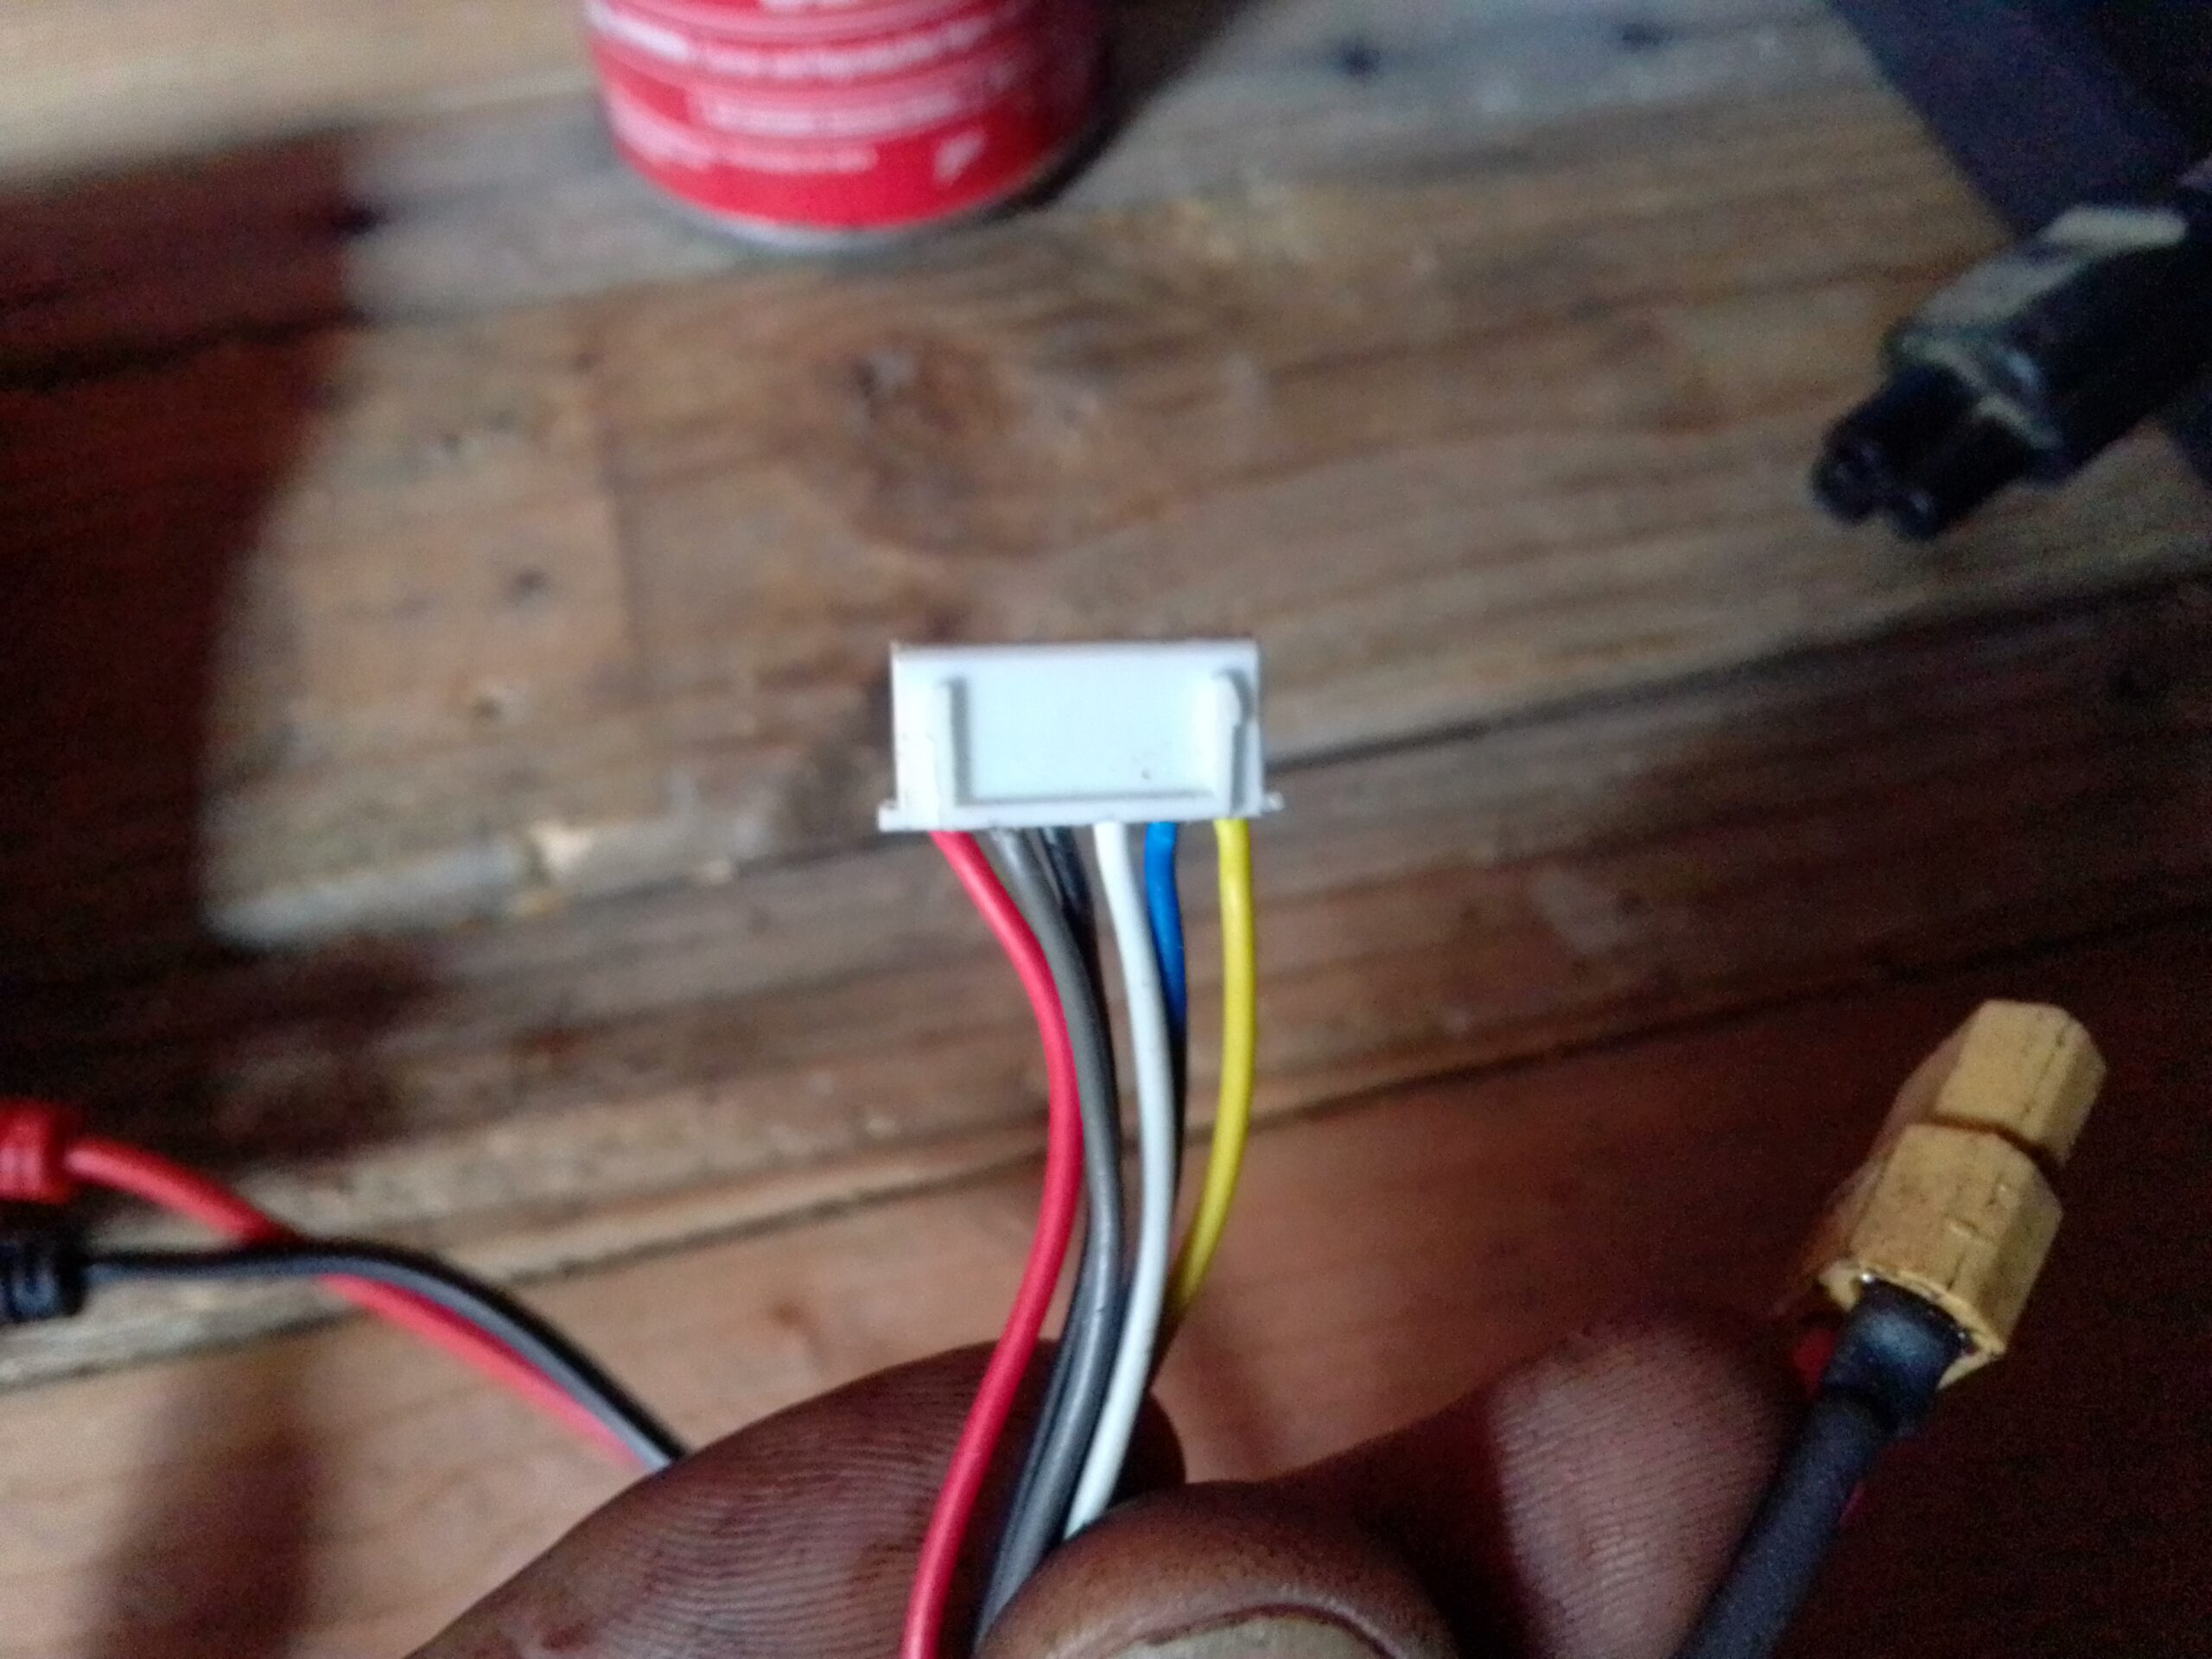
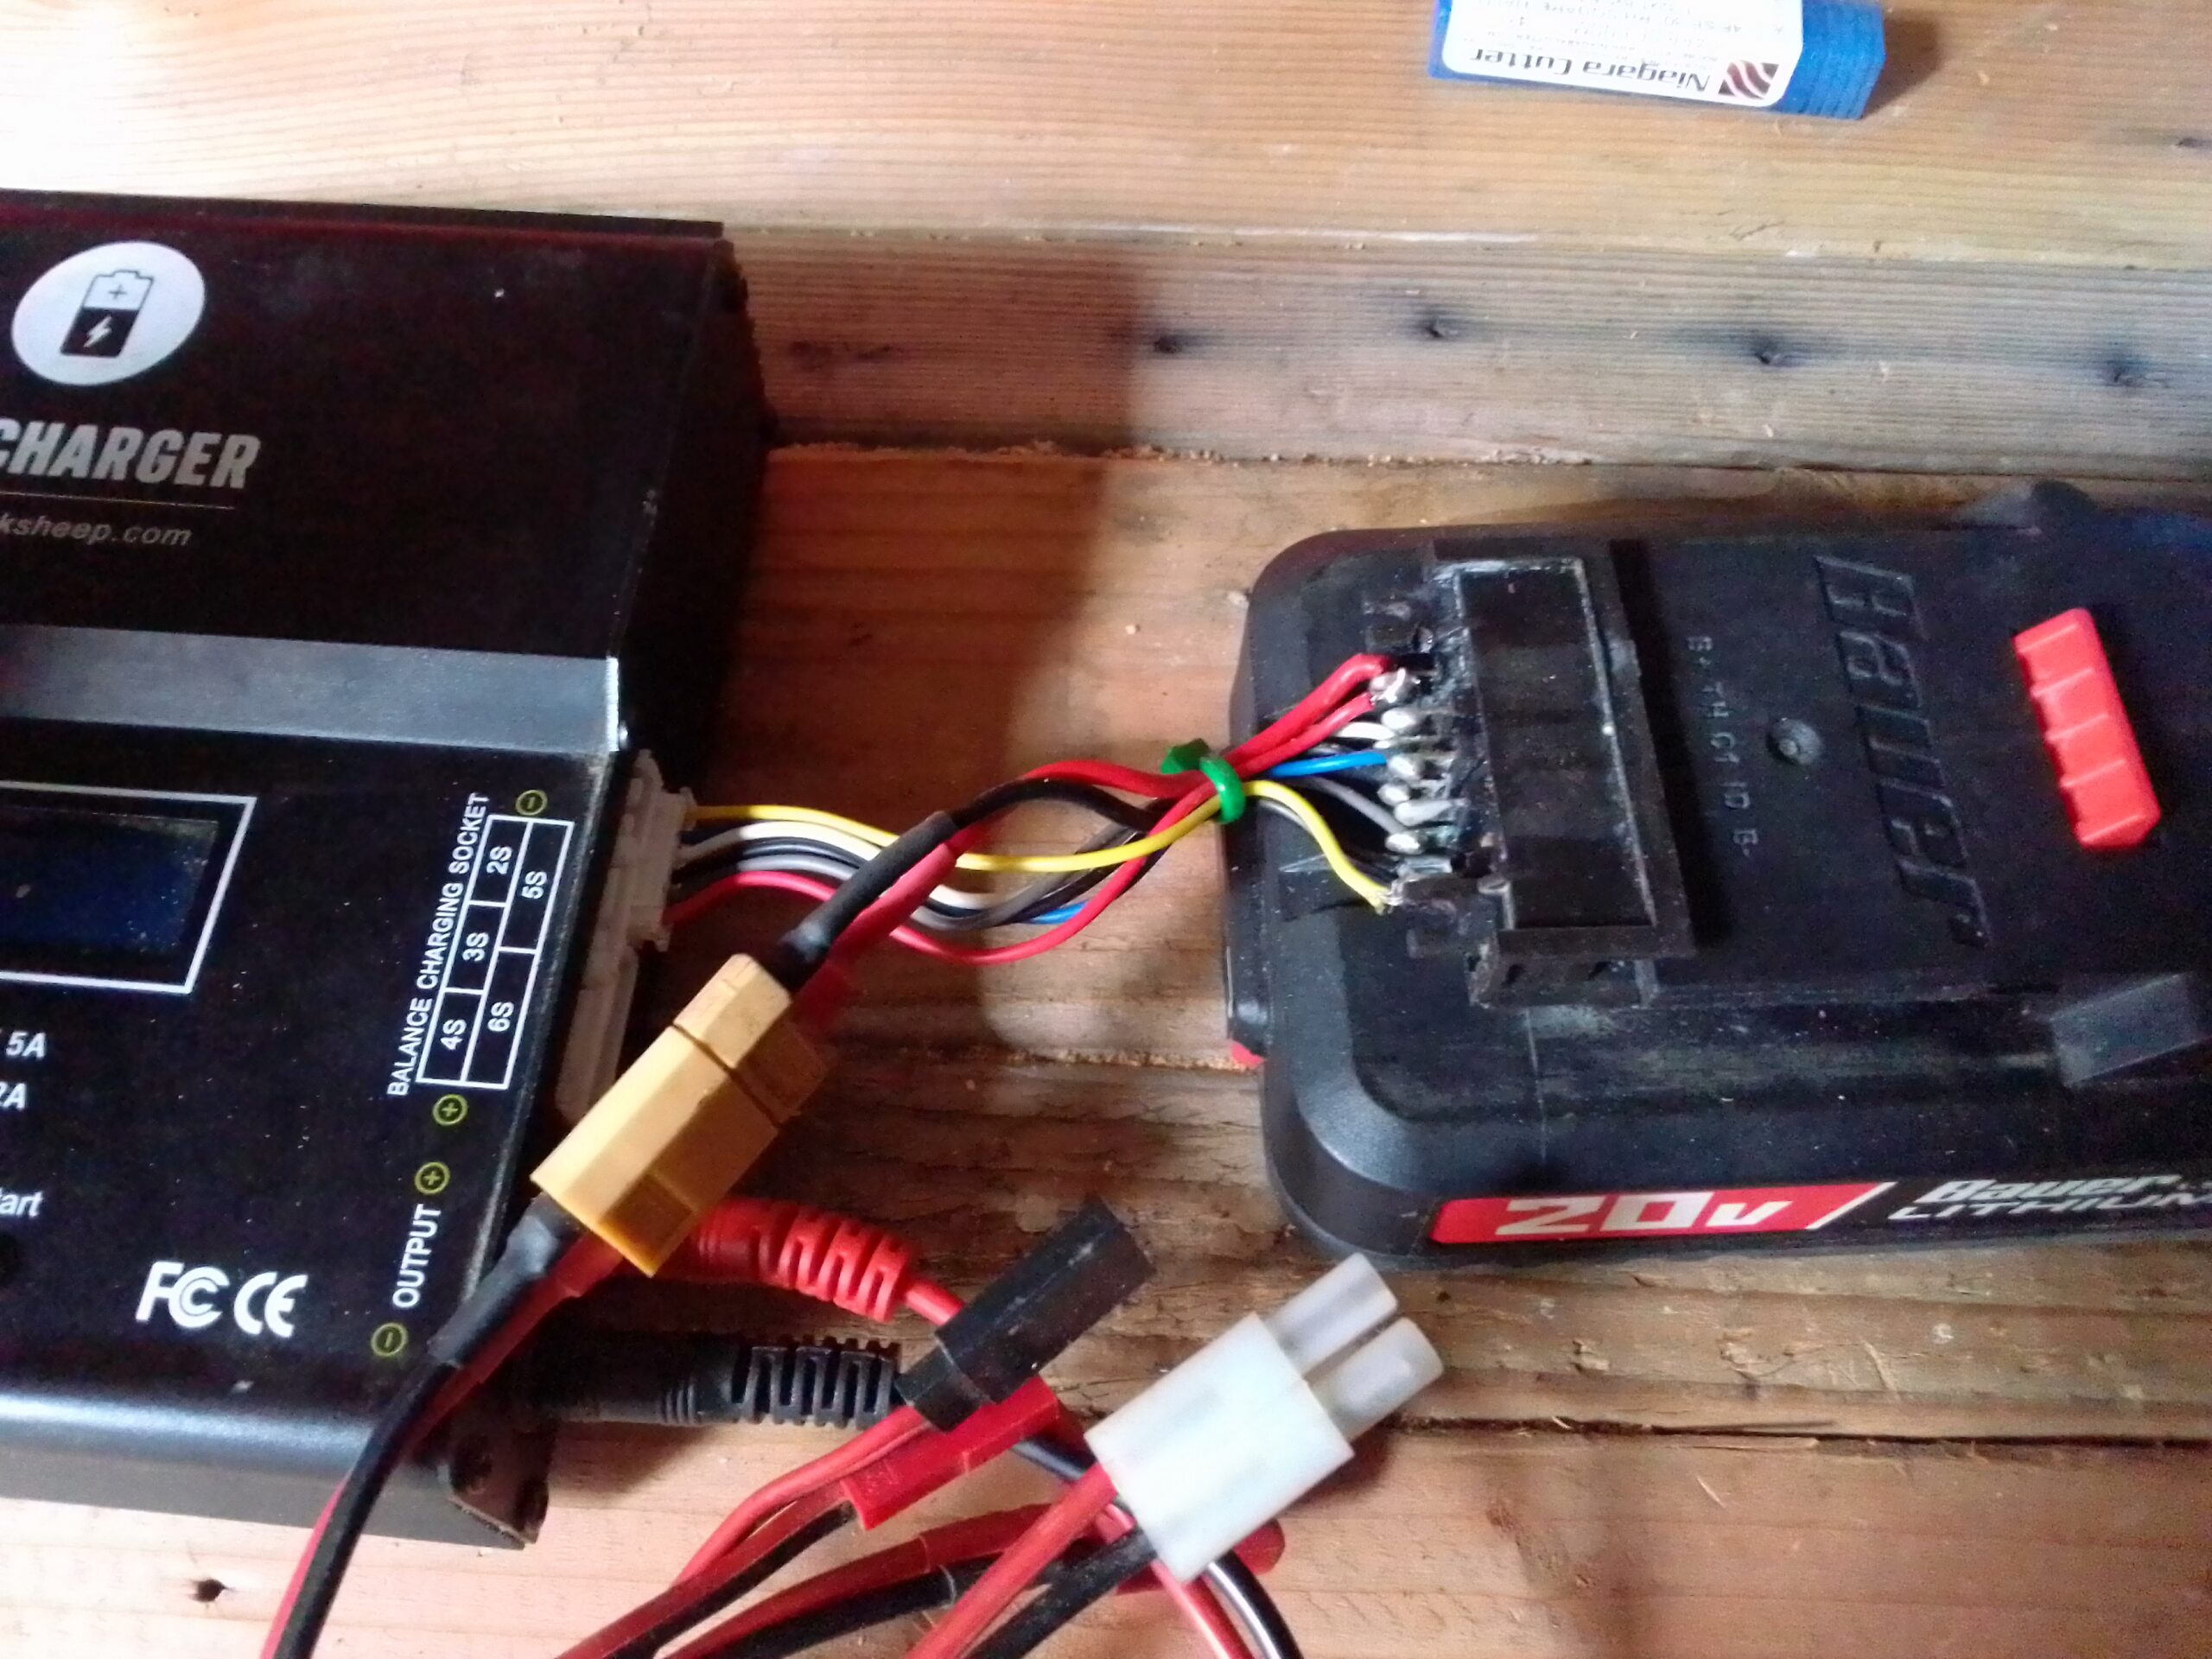
The adapter is finished and just needs to be tested. Plug the adapter into your Bauer battery pack. Using a volt meter your battery plug should show about 20v. With the bumps facing down your 6 pin plug should test as follows (voltages are approximate and will vary depending on the level of charge):

  1. Yellow: (-V)
  2.  Blue: (+3.7)
  3. White: (+7.4)
  4. Black: (+11)
  5. Grey: (+14.7)
  6. Red: (+18.4)

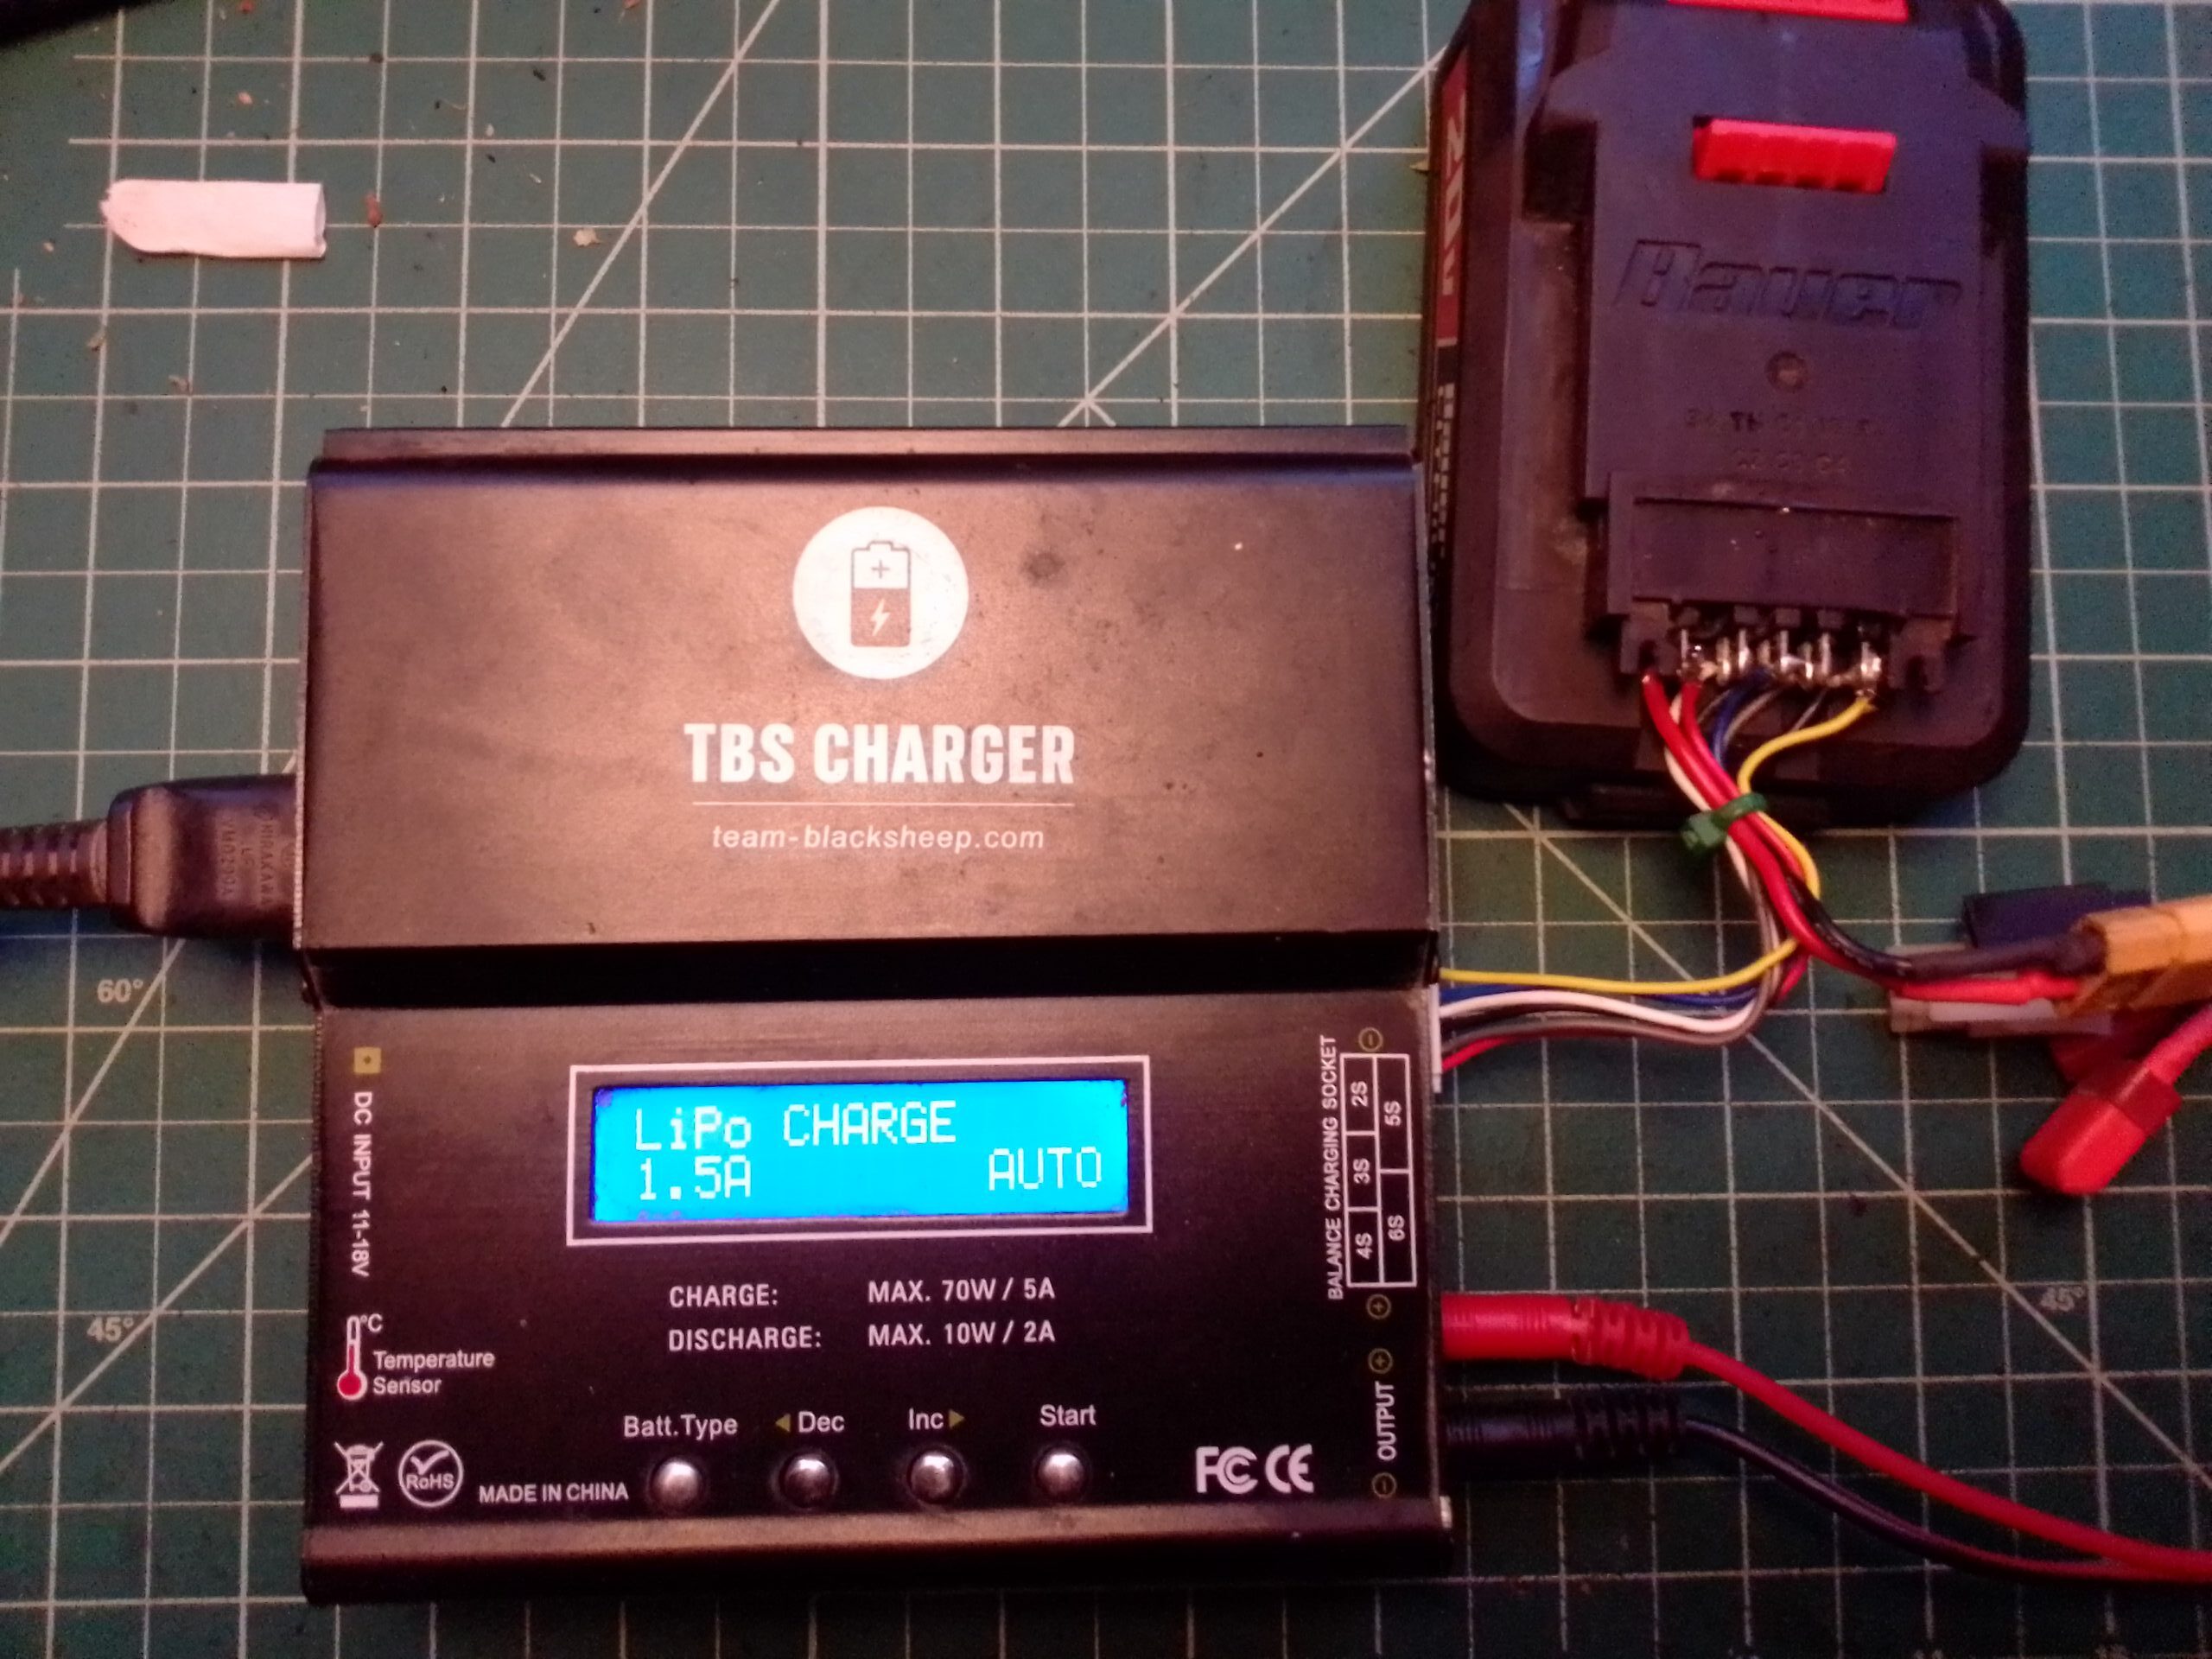
Using the adapter you can now connect and charge your Bauer tool packs. In the program mode set your battery type to 3.7V (Lithium Poly or LiPo). Set the amperage to match the AH listed on the side of the battery pack. The charger will auto-detect the number of cells (5) and  after doing a quick balance on the cells will charge the pack until full.

LiPo Charge, Auto
Charging in full swing
Individual Cell Voltages and Balance Charging

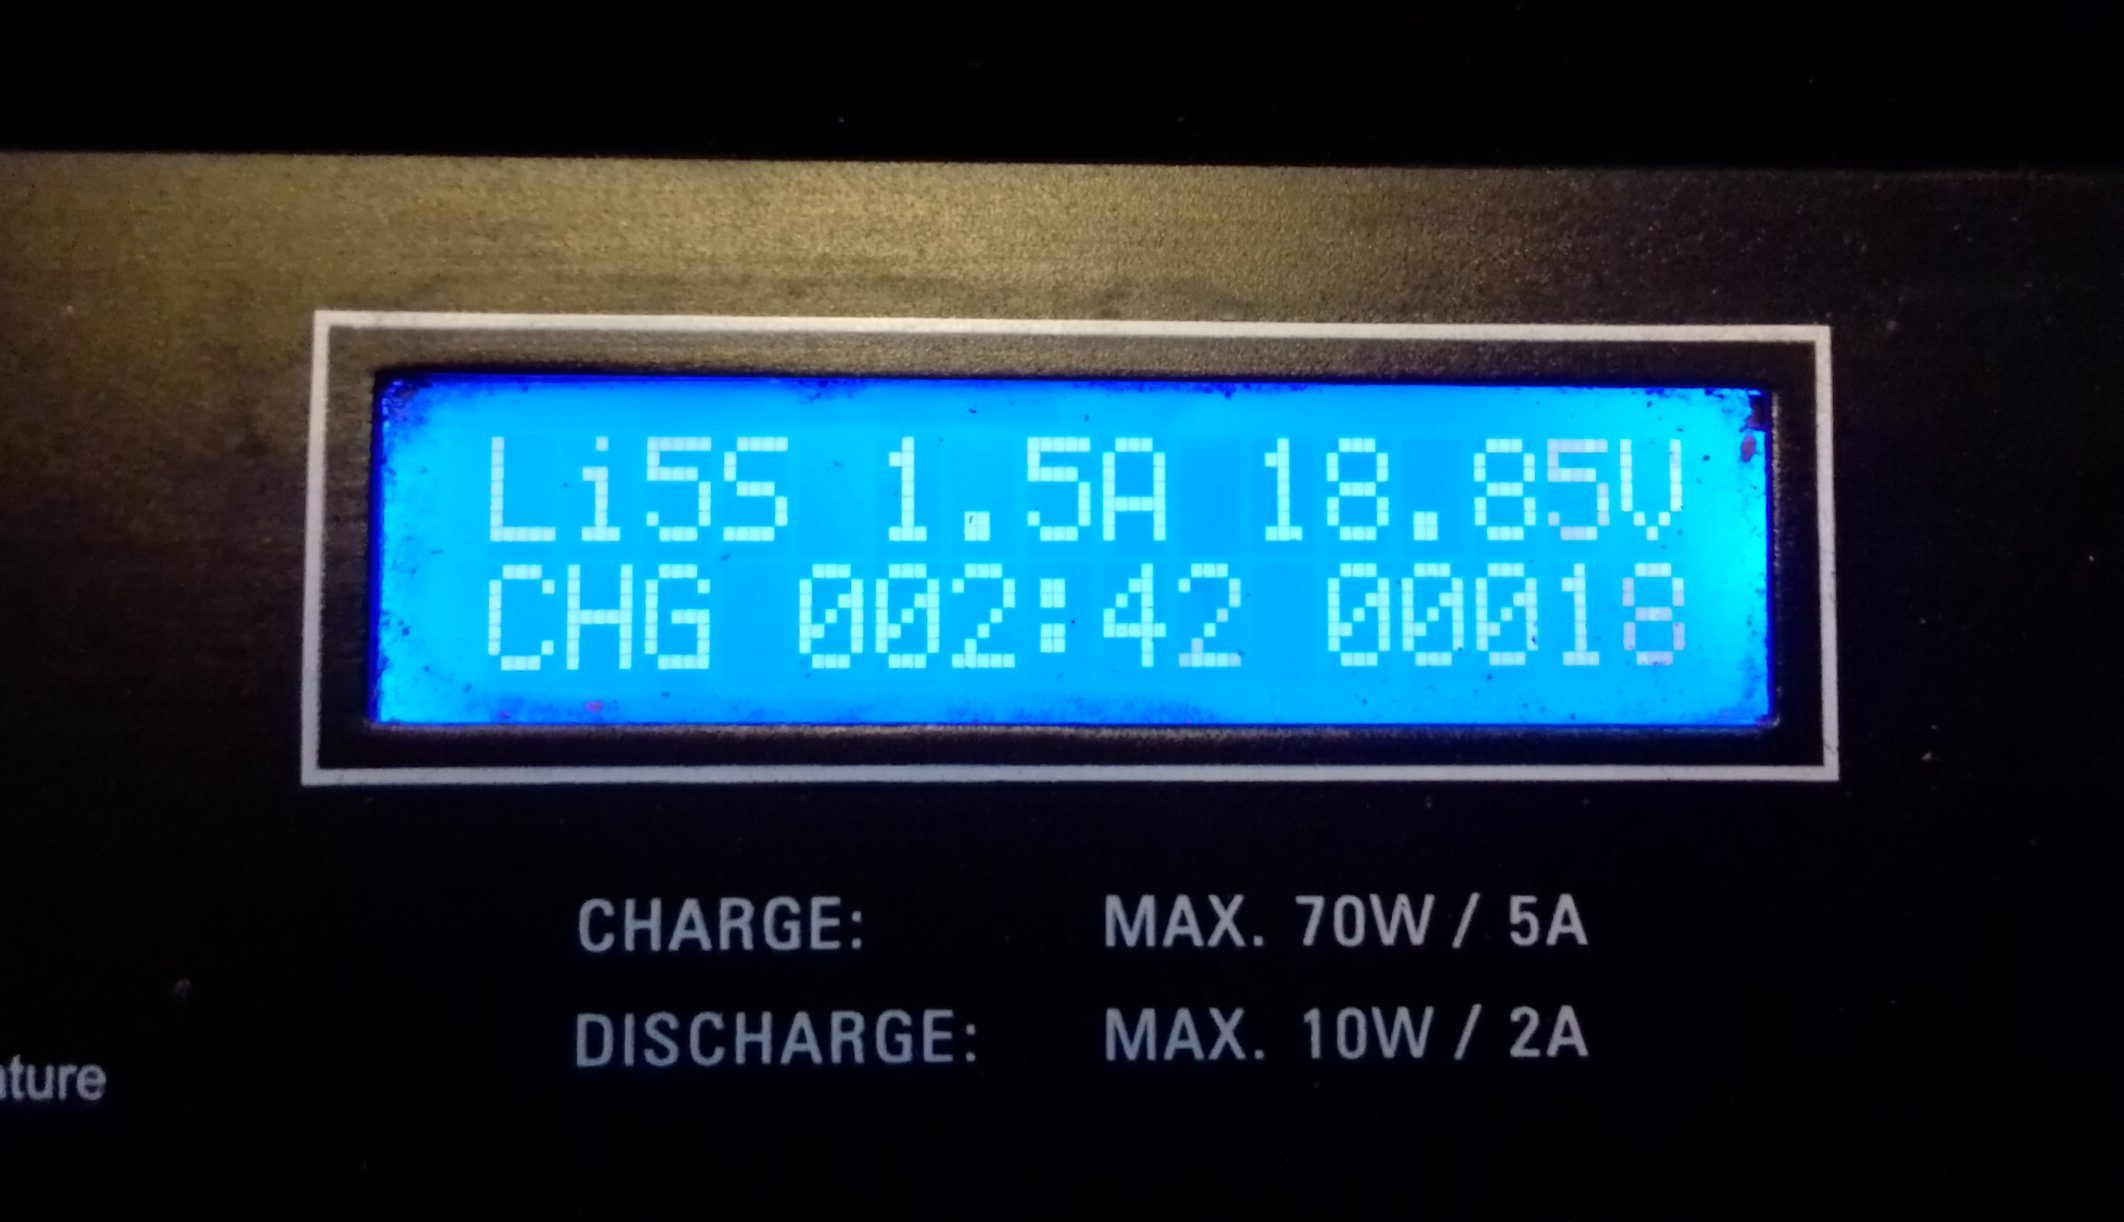
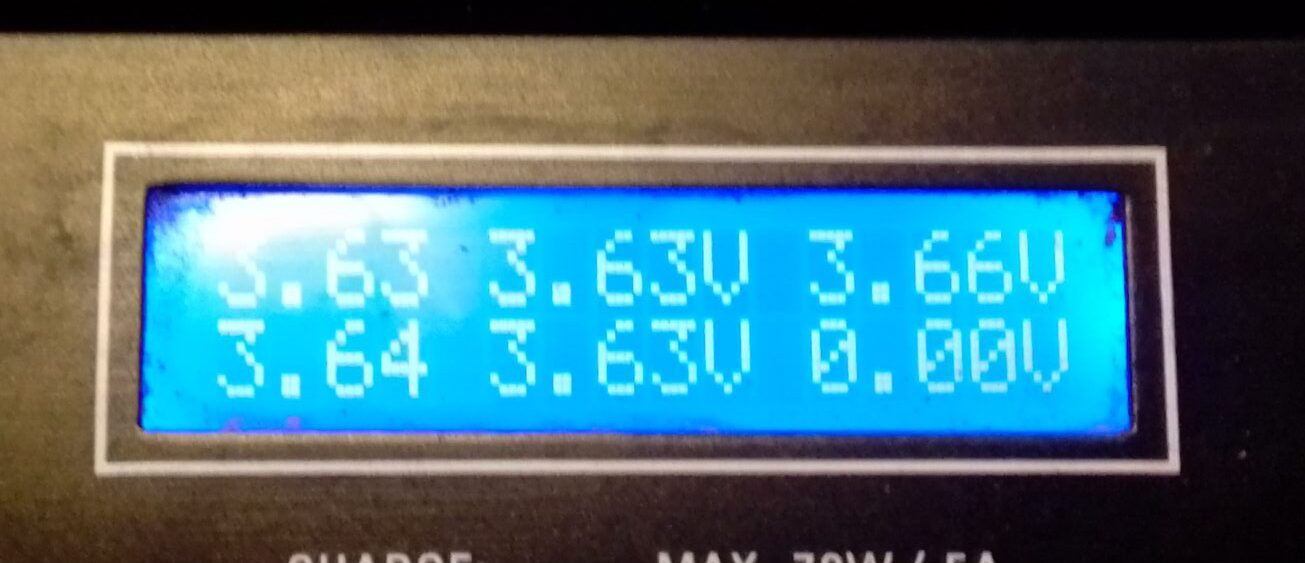
In summary, this hack is very simple and could be considered an upgrade to the charger from HFT. Having the info display showing the voltage of each cell and balance charge mode are both great. There is also a fast charge that I haven’t tried, but this already charges my batteries quicker and more completely than the Bauer charger.

If you enjoy my articles, please consider visiting my sponsors links or subscribing to my YouTube channel. Thanks!!!

Amex / Gemplus Smartcard Reader – Usage and Hacking

View Post

Looking for Smartcard info downloads? You have been directed here and download links are below.

Many many years ago I had a post on my old website, artofconfusion.org, oulining the research I did to get the old free Amex smartcard readers to work on Linux. Analytics are showing that people are still looking for the post, so I have added the info and doc downloads here.

A few years back american express introduced the Amex blue, the first US credit card using smart card technology. During the release of this card Amex was giving away, free of charge, no questions asked, a card reader to be used with their cards. This page will provide an outline for hacking that gcr415 smart card reader you were lucky enough to acquire.

The gcr415 is no more than the gemplus serial smart card reader with some fancy Amex stickers on it. Any software or data-sheets related to the gemplus serial will work with the gcr415. 

My progress

Windows: found appropriate driver for my windows 2k unit installs and works to install the driver. Use the driver i have it in the archives for gempc410 serial card reader. Use the install exe then go to the add hardware wizard -> add other device and it should appear with 4 choices. The driver that works is gemplus pcr410p serial smart card reader. Once its installed it is listed in the hardware section under smart card readers. The utility recognizes the device and can tell when a card is being inserted and removed i don’t have blank smart cards yet so its difficult to play further.

Linux:

Got the goodies together to get the card reader working in Linux (slack 10 kernel 2.4). First you need PC/SC-lite installed then you install the driver. Once it installs you need to set up a proper /etc/reader.conf file. You can look at mine:

$ cat /etc/reader.conf

FRIENDLYNAME "GemPC410"
DEVICENAME /dev/ttyS0
LIBPATH /usr/pcsc/drivers/libGemPC410.so.0
CHANNELID 1

it works and if you run

pcscd –fg stdout

you can watch the daemon at work…

Then if you install the perl wrapper for pcsc you can use the tools like pcsc_scan in another terminal or after running the daemon in the backgroud. Cool thing about the perl wrapper is you can build runtime compiling apps to work with the reader.

Smartcard / Gemplus Related Docs

For more information and downloads, check out my old smartcard research page.

The Amex serial Smartcard Reader:

Let’s crack it open and see what’s inside:

Smartcard Dimensions:


Configure Tarot 2D Gimbal on Linux / Wine

Having trouble getting serial devices in Linux to show up as COM ports ( eg, COM1 ) in Wine? So was I. Getting the correct software to configure your Tarot Gimbal and getting the com ports to work can be a nightmare.

Problem solved! Read on!

So you have a Tarot Gimbal and the included USB programming dongle.

On your *nix machine ( I am using Ubuntu, your mileage may vary ):

Make sure user has dialout privileges:

$ sudo usermod -a G dialout username

Log out and back in.

Install Wine:

$ sudo apt install wine

Configure wine to run XP

$ winecfg

Add required items to Wine registry (~/.wine/system.reg):

[Hardware\\Devicemap\\Serialcomm] 1231984861
"Serial0"="COM1"

More info here: https://onetransistor.blogspot.com/2015/12/wine-serial-port-linux.html

Plug in your USB to serial adapter to computer. Link device (ttyUSB0 in my case) to Wine com1

$ ln -s /dev/ttyUSB0 ~/.wine/dosdevices/com1

Download programming software: ZYX-BMGC-EN_V1.5.zip

Uncompress the file, right click on main application and select run with Wine.

Plug in connector on USB to Gimbal.

Select COM1 in software and click connect.

Power on drone/gimbal.

Hack Away!

Kombucha Recipe

We can all thank the Angelfish for giving me a reason to post this 🙂

The following recipe is for 1 gallon of ‘buch. It can be halved/doubled etc. to match your needs. All cooking times stay the same.

You will need:

Kombucha Brewing
Kombucha Brewing

2 quart pot
1 gallon of good water
1 cup sugar, organic unrefined preferred
1 SCOBY (AKA the Mother… a Symbiotic Colony Of Bacteria and Yeast)
1 cup starter tea
8 oolong, green or black tea bags
1 g glass jar. NO METAL!
1 piece of cotton cloth or paper towel. Holes in cheesecloth are too large, if using cheesecloth use at least 3 layers.
1 rubber band

Procedure:
Clean hands and all utensils with distilled vinegar after washing with NON-Antibacterial Soap.
Bring 4 cups of water and sugar to a boil.
Once boiling add the teabags, count to ten, then remove the pot from heat source.
Put the lid on the pot (leaving tea bags in) and wait for 5 mintues.
After 5 minutes remove the lid and add some water to fill up the pot.
Wait 5 more minutes.

SCOBY Farm!
SCOBY Farm!

Remove tea bags and squeeze them out. Let this “sweet-tea” sit and cool off for at least 20 minutes. Ideally temp should be below 110 degrees Fahrenheit before continuing.
Put SCOBY and starter tea in brewing jar. Pour sweet-tea into jar. Fill remaining space with water up to 1.5-2 inches from top of jar. Stir with WOODEN or PLASTIC spoon.
Cover jar with cloth and secure cloth with rubber band. Put jar in cool dark place (pantry or cupboard). Do not disturb jar while fermenting.

In a few days a new SCOBY will start to form on the top of the tea. After about a week start tasting your brew using a wooden or plastic spoon. When you like the flavor, you are done! Bottle it up and enjoy. Google for more recipes and flavoring ideas.

Baby SCOBYs
I got SCOBYs, who wants one???

NOTES:
Never expose SCOBY or ‘butch to direct sunlight.
Never expose brew to any type of metal.
When you first start brewing, there will be more yeast than usual.

It’s brown and gross looking. This is normal. Unless your SCOBY is super fuzzy everything is probably normal. As your SCOBY adjusts to it’s new environment it will get whiter and produce less yeast strands.
After brewing is finished, the new SCOBY can be separated from the old to start a new batch, make additional batches, give to a friend, make bio-pleather, etc.

After the first harvest, bottle all but a cup or two of the brew and just pour some new sweet tea in the jar and brew it.